
Bạn đã từng nghe đến Journey Builder (JB), công cụ quyền năng giúp bạn dẫn dắt khách hàng đi đúng đường đúng hướng?
Tốt, vậy giờ hãy tưởng tượng nếu ta có thể ra lệnh cho JB khởi động dựa trên hành vi từ một Salesforce record như khi trạng thái của một Case thay đổi, hoặc khi một Lead đạt đủ tiêu chí nào đó. Đó chính là Salesforce Data Entry.
Nghe hấp dẫn rồi đấy. Nhưng mà để mọi thứ chạy mượt như mơ, đôi khi bạn sẽ cần “chơi chiêu” bằng Salesforce Apex. Bài viết này Gâu Đần sẽ chỉ cho bạn cách nâng cấp Journey Builder một cách tinh tế nhưng hiệu quả bằng cách sử dụng SF Apex để điều khiển kịch bản đằng sau cánh gà.

Salesforce data entry source limitation
Đầu tiên, tại sao cần phải “nâng cấp” JB? Chẳng phải vốn dĩ nó được thiết kế để chạy khi có sự thay đổi hoặc khởi tạo record sao?
Quả là như vậy, về việc khởi động JB dựa trên việc khởi tạo record (record creation) thì chẳng có gì phải bàn nhưng nếu criteria là dựa trên sự thay đổi record (Is Updated) thì sẽ gặp vấn đề. Đó chính là record ở object đó trạng thái đầu tiên phải Unqualified đã sau đó được Qualified đúng với điều kiện thì mới đẩy vào journey!
Bạn có thể đọc thêm ở bài Tìm hiểu Salesforce data entry source trong SFMC journey này của Gâu Đần.
The ‘Update’ Action type only injects records that newly meet entry criteria upon evaluation.
Trích Records not injected to Journey Builder from Sales Cloud
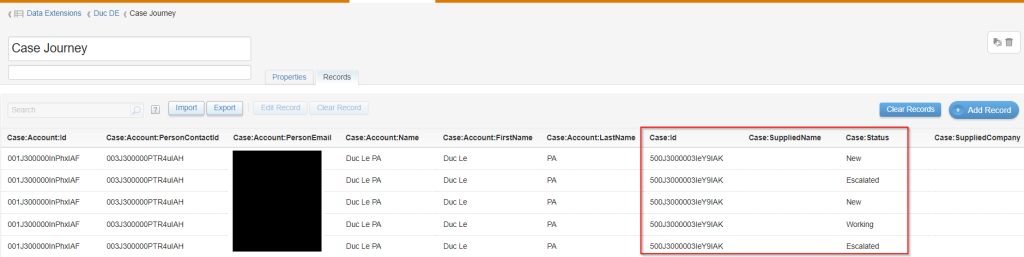
Như vậy việc muốn trigger vào journey mà điều kiện trigger dựa trên một field là picklist field sẽ không thành công. Ví dụ: trong object Case, tôi muốn mỗi khi Case status được update thì sẽ được inject vào journey nhưng nếu để criteria là Status equals “Working” OR Status equals “Escalated” OR…. thì các record này đang Qualified với điều kiện đẩy vào journey rồi nên sau khi update nó không đẩy vào nữa.
Cũng trong bài trên, bên Salesforce có đưa ra 02 cách giải quyết:
- Dùng một field phụ để làm trigger inject record vào journey. Nhưng làm sao tự động hóa quá trình này thì họ không nói.
- Mỗi value từ picklist thì tạo một journey để trigger cho value đó. Vậy picklist có ít value thì còn nghe được, chứ có 10 hay 20 cái mà tạo chừng đó journey thì một sự lãng phí, chưa nói đến việc rời rạc và khó monitor.
Solution design
Dùng một field phụ để làm trigger inject record vào journey vẫn là tối ưu nhất cho trường hợp này.
Case scenario
Mỗi khi Case status thay đổi, tôi dùng Journey Builder để ….. với người dùng
Idea
- Tạo một check box field
Send_to_Journey__cở object Case (Salesforce CRM). Khi Send_to_Journey__c = true → Case record được inject vào journey - Tạo Journey Builder (Salesforce Marketing Cloud) ở object Case với criteria là Send_to_Journey__c = true
- Vậy cũng tức là mỗi khi Case status ở SF CRM thay đổi thì Send_to_Journey__c phải set bằng true
- Nhưng để JB tiếp tục gửi khi Case status tiếp tục thay đổi thì Send_to_Journey__c cần được reset về false
SF Apex sẽ dùng để giải quyết bước 3 và 4.
Let’s make some codes
Phần tạo journey các bạn tự làm nhé! Còn sau đây là phần ở Salesforce CRM
Disclaimer: Mình không phải là SF Apex expert!
Handler Class
Tạo một handler class để kiểm tra status cho thay đổi không, nếu có thì set Send_to_Journey__c = true
public class CaseStatusChangeHandler {
    public static void updateJourneyCheckBox(List<Case> newCaseList, Map<Id,Case> oldCaseMap) {
        for(Case newCase: newCaseList){
            Case oldCase = oldCaseMap.get(newCase.Id);
            if(newCase.Status != oldCase.Status){
                newCase.Send_to_Journey__c = true;
            }
        }

    }
}
Tạo môt handler class để reset Send_to_Journey__c về false
public class CaseSendToJourneyHandler {
    public static void resetSendToJourneyFlag(List<Case> newCases){
        Set<Id> caseIds = new Set<Id>();
        for(Case c: newCases){
            if(c.Send_to_Journey__c == true){
                caseIds.add(c.Id);
            }
        }
        if(!caseIds.isEmpty()){
            resetSendToJourneyAsync(caseIds);
        }
    }
    @future
    private static void resetSendToJourneyAsync(Set<Id> caseIds){
        List<Case> updates = new List<Case>();
        for(Case c: [Select Id, Send_to_Journey__c  From Case Where Id In : caseIds]){
            c.Send_to_Journey__c = false;
            updates.add(c);
        }
        if(!updates.isEmpty()){
            update updates;
        }
    }
}
Giải thích thêm: việc update này phải là Async method tức là nằm trên một transaction riêng. Vì nếu nằm trên một transaction thì Journey (bản chất là flow khi ở trên Salesforce CRM) sẽ không nhận ra.
Chẳng hạn nếu cùng 1 transaction:
Bản chất: status field thay đổi → Send_to_Journey__c = true → Send_to_Journey__c = false
Flow thấy: status field thay đổi → Send_to_Journey__c = false
Vì thế nó sẽ không thấy dữ kiện Send_to_Journey__c = true nên không bắn sự kiện vào vào MC journey
Apex Trigger
trigger CaseTrigger on Case (before insert, before update, after update, after insert) {
    if(Trigger.isBefore && Trigger.isInsert){
        // Do something here
    }
    else if(Trigger.isBefore && Trigger.isUpdate){
        CaseStatusChangeHandler.updateJourneyCheckBox(Trigger.new, Trigger.oldMap);
    }
    else if(Trigger.isAfter && Trigger.isInsert){
        CaseSendToJourneyHandler.resetSendToJourneyFlag(Trigger.new);
    }
    else if(Trigger.isAfter && Trigger.isUpdate){
        CaseSendToJourneyHandler.resetSendToJourneyFlag(Trigger.new);
    }
}
Test Class
@isTest
private class TestCaseStatusChangeHandler {
    @isTest
    static void TestCaseStatusChangeHandler() {
        // Initilize the test data
        List<Case> lstCase = new List<Case>();
        Case c1 = new Case(Priority = 'High', Status = 'New', Send_to_Journey__c = false);
        lstCase.add(c1);
        insert lstCase;
        // Update Case status
        c1.Status = 'Working';

        //Perform Test
        Test.startTest();
        update lstCase;
        Test.stopTest();

        // Verrify result
        Case updatedCase = [Select Status, Send_to_Journey__c From Case Where Id =: c1.Id];
        System.assertEquals(false, updatedCase.Send_to_Journey__c, 'Send_to_Journey__c should be false after updating the record.');
        System.assertEquals('Working', updatedCase.Status, 'Expect Status to be "Working"');
    }
}
@isTest
private class TestCaseSendToJourneyHandler {
@isTest
static void testCreateCase() {
// Initilize the test data
List<Case> lstCase = new List<Case>();
Case c1 = new Case(Origin = 'Email', Priority = 'High', Status = 'New', Send_to_Journey__c = true);
lstCase.add(c1);
// Perform the test
Test.startTest();
insert lstCase;
Test.stopTest();
// Verify the test result
Case testCase = [Select Id, Send_to_Journey__c From Case where Id = :c1.Id];
System.assertEquals(false , testCase.Send_to_Journey__c, 'Send_to_Journey__c should be false');
}
@isTest
static void testUpdateCase() {
// Initilize the test data
List<Case> lstCase = new List<Case>();
Case c2 = new Case(Origin = 'Email', Priority = 'High', Status = 'New', Send_to_Journey__c = false);
lstCase.add(c2);
insert lstCase;
// Update Case
c2.Send_to_Journey__c = true;
// Perform the test
Test.startTest();
update lstCase;
Test.stopTest();
// Verify the test result
Case testCase = [Select Id, Send_to_Journey__c From Case where Id = :c2.Id];
System.assertEquals(false , testCase.Send_to_Journey__c, 'Send_to_Journey__c should be false');
}
}Giờ các bạn có thể thử thay đổi Case status xem, nó sẽ tự động trigger vào journey này!
Conclusion
Thế là xong! Một cú bắt tay giữa Apex và Journey Builder tưởng như đơn giản, nhưng lại mở ra rất nhiều khả năng tự động hóa mạnh mẽ, thông minh và linh hoạt hơn cho Journey của bạn.
Dù bạn đang theo dõi trạng thái Case, hay lắng nghe tín hiệu từ bất kỳ đối tượng nào trong Salesforce, thì chỉ cần một chút Apex đúng lúc là Journey Builder sẽ “nghe lời” ngay. Hehe.


